Model 1300 Instruction Sheet
Tips For Assembly
-
Before you begin assembly, locate the instructions and hardware. Then take out all the parts and compare them to the photograph and assembly illustrations. Be sure you have all the parts and can identify them.
-
A helping hand is always good: assemble your unit with an adult assistant if possible. Assembly time will be approximately 30 minutes.
-
The cement log is heavy. Put the fireplace as close to the desired location as
possible before inserting the cement log set and REAL FLAME cans of fuel.
-
Locate a good Phillips-head screwdriver, you may use an electric screwdriver.
|
Number |
Description |
Part Number |
Quantity |
|
1 |
Base |
1301 |
1 |
|
2 |
Left Side Panel |
1302 |
1 |
|
3 |
Right Side Panel |
1303 |
1 |
|
4 |
Left Trim Panel |
1304 |
1 |
|
5 |
Right Trim Panel |
1305 |
1 |
|
6 |
Center Panel |
1306 |
1 |
|
7 |
Mantel Top |
1307 |
1 |
|
8 |
Firebox |
4099 |
1 |
|
9 |
Mantel Grate |
0001 |
1 |
|
10 |
Mantel Log |
2605 |
1 |
not shown Bag of 1" Screws 9713 and 2 -Firebox Clips 1075
|
Before assembly, use scissors to unwrap the parts from the packaging. Check for hardware that is wrapped in the packaging to be sure you don't discard it. You may have extra hardware. For easier assembly, use a power Phillips-head screwdriver. Use Caution not to over tighten screws.
|
Step One
-
-
Set the Base (1) on a flat, carpeted surface.
-
Insert the Left Side Panel (2) into the left
end of the slot in the Base.
-
Wood mounting blocks and tongue edge
will be at the front edge of the Side Panel.
-
Screw Side Panel to Base through holes at
the bottom of the Panel.
-
Repeat with Right Side Panel (3) at the
right end of the slot in the Base.
-
Screw Right Side Panel to Base through holes at
the bottom of the Panel.
|
 |
Step Two
-
Attach Left Trim Panel (4) to the Left Side Panel at the tongue and groove on the edges.
-
Screw the Left Trim Panel into the Left Side Panel through the mounting blocks attached to the Side Panel and bottom of trim panels.
-
Repeat with Right Trim Panel (5) and Right Side Panel and screw together through the mounting blocks attached to the Side Panel.
-
Hold Center Panel (6) so that the arch side of the panel is up.
-
Slide the grooves at the outer edges of the Center Panel onto the tongues on the Right and Left Trim Panels and press Center Panel down over dowels on top of Trim Panels. Hint: if working alone, carefully place unit on its side on a carpeted surface to insert the Center Panel.
-
Make sure the Center Panel is firmly against the two side panels.
-
Screw the Center panel into the two Side panels through the side blocks.
|
 |
Step Three
-
Slide Mantel Top (7) onto top of unit.
-
Screw Mantel Top to unit using screw holes in Center Panel and Side Panels.
|
 |
Step Four
Note: illustration is for use with assembly of
all models and may not look exactly like your
model.
-
Turn Unit so you are looking at the back of it.
-
This unit contains clips that are located on the left and right sides of the opening.
-
Unscrew and detach both clips.
-
Turn Firebox so open side faces your unit.
-
Insert open side into unit from the rear through the opening in the unit.
-
Set Firebox on the Base firmly against opening. Upper lip and lower tray of Firebox should extend through to the front of the unit.
-
Insert Firebox from the back of mantel.
-
Make sure Firebox is pressed tightly against the assembled unit.
-
Reattach the above-mentioned clips, making sure the clips overlap the flanges on the sides of the Firebox.
|
 |
Step Five
Note: illustration is for use with assembly of
all models and may not look exactly like your
model.
-
Set mantel grate at front of Firebox.
-
Move the unit to the desired location.
-
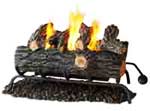
Carefully place log on top of grate behind L-brackets.
-
Place 1-3 cans of Real Flame gel fuel on grate behind the log.
|
 |
Tips For Use
1. It will take a few minutes after lighting for the Flame to reach its full height.
2. To open can, remove the paper label. Hold one hand over the lid and pry the lid gently away from you using a REAL FLAME lid opener which you may find in our gel flame accessories pages. If lid opener is unavailable a flat-head screwdriver will work.
3. For maximum efficiency, let your REAL FLAME fire burn for its full 2 1/2 - 3 hour duration.
4. Before re-lighting a partially used can, stir the fuel to help ignition.
5. Use long fireplace matches or a long nose grill lighter to ignite the gel fuel.
Just Fireplaces.com
3400 Westgate Dr
Durham, NC 27707
Toll Free 1-888-818-2732
Factory Authorized Dealer for Gelfuel Fireplaces
Click on the Products List to continue shopping.